Double-slit method
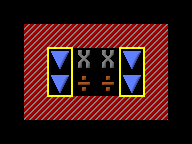
Двухщелевой метод — метод пробития водоносного горизонта неопределенной глубины, предложенный QuantumMenace на форуме. Метод назван именно так за использование двух каналов-щелей по бокам площадки 2×2 тайла.
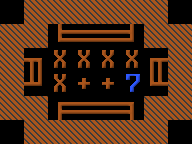
С помощью щелей пробивается водоносный слой уровнем ниже, из-за чего они наполняются водой (рампы канала становятся синими). Эта вода может быть перекачана из одной щели в другую с чуть большей скоростью, чем та, с которой водоносный слой успевает заливать канал. Пока один дварф качает помпу, другой может спуститься по рампе в осушенную щель и закупорить нижний этаж стенами одна за одной.
Осушение водоносного слоя
Перед тем как осушать водоносный горизонт, неплохо узнать о его некоторых основных особеностях.
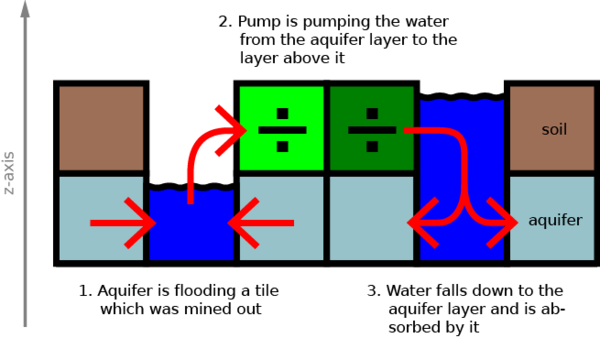
Тайлы водоносного слоя производят бесконечный поток воды, но они точно так же могут бесконечный поток воды поглотить. Эту особенность можно использовать, чтобы использовать горизонт как приемник его же собственной воды, причем как в пределах одного уровня, так и с разницей через несколько этажей.
Многоэтажный слив
Двухщелевой метод для всех слоев водоносного горизонта, кроме самого нижнего, использует трюк с многоэтажным сливом. Заключается он в том, что как только удается вскрыть доступ к горизонту ниже, вся вода из верхних слоев горизонта уходит в образовавшуюся дыру.
Осушение в пределах одного слоя
Двухщелевой метод подразумевает иную перекачку воды на самом нижнем слое. Здесь вода выкачивается из тайла, залитого водоносным горизонтом на пустой уже осушенный тайл уровнем выше, откуда вода утекает обратно вниз и поглощается тем же самым горизонтом. Разумеется, чтобы вода могла утечь, в тайле-приемнике воды должен быть пробит пол (каналом либо лестницей вниз).
Обучающий эмбарк
Далее двухщелевой метод будет описан в виде пошаговой инструкции. Для первого раза имеет смысл собрать эмбарк, идеальный для пробития водоносного горизонта и не предназначенный для дальнейшей игры. Для полноты эксперимента место высадки надо взять в лесистом месте недалеко от океанов, чтобы гарантированно получить на старте многослйный горизонт. Экспедиция будет состоять из:
- 1 Proficient Miner
- 4 Proficient Carpenters
- 2 Proficient Wood cutter
Можно выкинуть наковальню, одну кирку и все колчаны, лестницы, лангеты и прочую ерунду, чтобы купить полный вагон бревен. Это сэкономит время на рубке деревьев. Как минимум одна кирка и два топора должны остаться.
Процесс
Подготовка
Из дерева строим столярку и делаем все необходимые детали:
Смотрим, с чем имеем дело
Копаем до водного горизонта
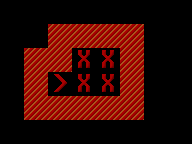
Копаем 2×2 лестницу вниз к водоносному слою:
Проверяем, есть ли под первым водоносным слоем еще слои
Когда выкапываем лестницу вверх/вниз в горизонте, ставим игру на паузу и через . пошаговую раскадровку ловим момент вскрытия тайла, пока туда не успела налиться вода.
Если в описании нижнего блока написано "Damp что-то", то ниже идет еще один водоносный слой и дальше мы сможем слить в него воду из верхнего слоя. Если слова Damp нет, и это нормальный камень, то придется справляться с последним слоем горизонта.
Справляемся с верхними слоями
Нам надо перелить один слой горизонта в тот, что под ним.
Сливаем верхний слой в нижний
Надо получить доступ к нижнему слою горизонта, чтобы его вскрыть:
Now we will pump the water from one slit into the other. A pump can only be placed on a floor, not a staircase.
Unfortunately, this pump won't work if there is stairs in its source tile.
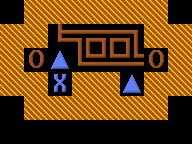
Here, too, you should . One-Step to peek under the second layer of your aquifer to know what you will have to deal with further below. Once the up/down stairs are dug, disassemble the pump, turn it to the other direction and dig more stairs there. (Don't forget to channel out the downstairs in the pump's source tile.) You should end up with something like this:
Now you can stop and dismantle the pump. The upper aquifer level is being drained into the lower one and is accessible without the help of a pump.
Задраиваем верхний этаж
You can now secure the upper aquifer level by cautiously walling it off. The procedure described here takes about one in-game month per level of aquifer. It involves building walls to seal the aquifer off. To build walls more quickly, build them out of blocks, rather than stone or wood. To get the least amount of job cancellations, build them in the order suggested here.
Now the water from the aquifer will start to push your miners and workers around, so be careful and do this step by step. Expect some job cancellations. You can minimize them by building out of blocks (e.g. wood blocks) rather than normal logs (or stone):
Now you have secured one level of the aquifer. If there are at least two other levels below this one, you can repeat the procedure described in Dealing with the upper aquifer levels. Else, follow the procedure described in Dealing with the lowest aquifer level.
Справляемся с последним слоем
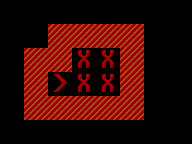
If you have come here after you've been drilling through one or more aquifer levels above, your starting point looks like this:
Or you were just lucky and have encountered only a one-level aquifer. In that case you are starting with this:
In any case, we must now prepare our grounds for pumping the last aquifer level from one slit to another.
Подготовка
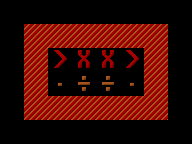
If you have nothing but your probing downstairs, you'll be done with this step in no time:
Once you have this, you can skip the rest of this section and proceed with Walling off the last aquifer level.
If, however, your slits are filled with nothing but up/down stairs, things become more complicated. Pumps cannot pump from a source tile which has stairs. Yet you must keep both slits accessible for your dwarves. Therefore:
Don't dig out both stairs of a slit. The slit must remain accessible at all times. Either via a ramp or via stairs. Only now when you have built the ramp which will serve your dwarf for accessing the slit, you can prepare the next tile of the slit like this:
Now we need to move the pump onto the other pair of stairs, but must be careful to not lose access to this level from above. We proceed this way:
You can now proceed with Walling off the last aquifer level.
Огораживаем нижний этаж
This part will take you 2–3 months in-game time. You start this step with either of these scenarios:
They only differ in a down vs. up/down staircase and constructed vs. natural walls or stairs. The procedure from now is the same for both of them. Since multi-level aquifers are more Fun, we will use the latter one for the rest of this tutorial.
As you will be constructing walls in an aquifer layer, the construction will get suspended very often. Yet every time your carpenters or masons get the chance to touch the wall, its construction will proceed a little bit and will be done eventually. Just be patient and keep unsuspending the work. Constructing these walls out of blocks rather than usual logs or stones speeds it all up considerably.
Keep in mind, that dwarves cannot construct a wall if they only can access it diagonally. Hence you will need to build the hardly accessible walls first. Best you follow this tutorial exactly.
Theoretically, you could now take a shortcut and build a wall instead of the stairs in the south-western corner. Then you would be safe to make an up/down staircase instead of the ramp in the pump's source tile. This would grant you a 1×1 access under your aquifer. You could in turn find a sink for all aquifer levels (e.g. a lake in a cavern) and pierce through the aquifer from below, draining it across multiple z-levels and drill a hole of any size and shape into it. (See a YouTube tutorial video about this in the link section.)
However, you are only a few more steps away from a nice 2×2 stairway through the aquifer (easily extendable to 4×2), so you can as well proceed. It is safer, anyway:
Leave the ramp and stairs in the slit—you will need them both for access and as a water sink. Deconstruct the pump and rebuild it pumping from the other direction (here: pump from the east). You will repeat the procedure mirrored:
Deconstruct the ramp in the source tile of the pump and build a wall there. You will be able to build a wall there right away if you have dug the ramp, rather than constructed it.
Now the finale. Here we will need to build the pump instead of the two southern up/down staircases. You can build the floor over them right away if they are dug, else you will have to deconstruct them first.
Don't dig or wall the last piece of aquifer in that corner. You will now need it as a sink. Deconstruct the pump and turn it over to pump from the west. For the pump to work, you will need to remove (channel out) the stairs over the pumps source tile.
Now deconstruct the pump and the floor underneath it, you won't need it anymore. The only way how to safely dig the last piece of aquifer is diagonally or from above, because aquifers don't leak that way, therefore:
You are basically done now. The rest of the water will evaporate.
Наводим марафет
Once the last aquifer tile is gone, the 7/7 water on the ramp tile will spread and eventually evaporate. It is safe to deconstruct the inner walls and ramps now.
Congratulations to your 4×2 hole through the aquifer. Be very careful not to mine the first non-aquifer layer any wider than your secured staircase dimensions. The aquifer above this level would flood it. Leave at least one layer of stone between your aquifer and the layer where you want some spacy rooms.
Ссылки
- A good youtube tutorial covering this method, taking the shortcut later and working the aquifer from below
- Another Youtube tutorial which doesn't take any shortcuts and works directly from the surface.
- Quantum's original forum post — QuantumMenace improved Hans Lemurson's pump method.
